So you're thinking about accessing your Raspberry Pi remotely from your Windows machine, even though it's hiding behind a NAT router? That sounds like a pretty cool project, doesn't it? If you're into tinkering with tech stuff, this is one of those skills that can open up a whole new world of possibilities. Whether you're a hobbyist or a pro, knowing how to set up remote SSH into your Raspberry Pi is a game-changer. It's like giving yourself a secret backdoor to your little computer, allowing you to control it from anywhere in the world.
Now, before we dive headfirst into the nitty-gritty details, let's break it down for those who might be scratching their heads. SSH stands for Secure Shell, and it's basically a protocol that lets you connect to another computer over a network securely. Think of it as a secure phone line between you and your Raspberry Pi. And if your Pi is tucked away behind a NAT router, which is pretty common in home networks, you'll need to do a bit of extra setup to make sure you can still reach it from the outside world.
This guide is designed to walk you through the entire process step by step, so even if you're new to all this tech jargon, you'll be fine. We'll cover everything from setting up your Raspberry Pi to configuring your router and ensuring everything works smoothly. By the end of this, you'll be able to SSH into your Pi from your Windows machine like a pro, no matter where you are.
Read also:Kannada Prabha Today Epaper Your Daily Dose Of News In Karnataka
Table of Contents
- Setting Up Your Raspberry Pi for SSH
- Enabling SSH on Raspberry Pi
- Finding Your Raspberry Pi's IP Address
- Configuring Your NAT Router
- Using an SSH Client on Windows
- Port Forwarding Explained
- Security Considerations for Remote SSH
- Troubleshooting Common Issues
- Alternative Methods for Remote Access
- Conclusion and Next Steps
Setting Up Your Raspberry Pi for SSH
Alright, let's get started with the basics. Before you can start playing around with remote SSH, you need to make sure your Raspberry Pi is all set up and ready to go. First things first, you'll want to install the latest version of Raspberry Pi OS on your little device. Don't worry, it's not as complicated as it sounds. Just download the image from the official Raspberry Pi website, and use a tool like Balena Etcher to flash it onto your microSD card.
Once your Pi is up and running, you'll want to make sure it's fully updated. Open up a terminal on your Pi and run the following commands:
sudo apt updatesudo apt upgrade
This will ensure that all your software packages are up to date and that you're working with the latest security patches. Trust me, you don't want to skip this step. It's like giving your Pi a fresh coat of paint before hitting the road.
Enabling SSH on Raspberry Pi
Now that your Pi is all set up, it's time to enable SSH. By default, SSH might not be enabled, so you'll need to turn it on manually. There are a couple of ways to do this, but the easiest one is to use the Raspberry Pi Configuration tool. Just type sudo raspi-config into your terminal, and navigate to the Interfacing Options. From there, select SSH and enable it. It's as simple as that.
If you're feeling adventurous, you can also enable SSH by creating a file called "ssh" without any extension on your boot partition. This method is great if you want to enable SSH without even booting into the OS. Just pop your microSD card into your computer, create the file, and you're good to go.
Finding Your Raspberry Pi's IP Address
Now that SSH is enabled, you'll need to know your Raspberry Pi's local IP address. This is the address that your router assigns to your Pi on your local network. You can find it by typing hostname -I into your terminal. This will spit out a bunch of numbers separated by dots, and that's your Pi's IP address. Write it down or copy it somewhere, because you'll need it later.
Read also:Boo Williams Sportsplex Your Ultimate Playground For Sports Enthusiasts
But here's the thing: your Pi's IP address can change if your router decides to reassign it. To avoid this headache, you can set a static IP address for your Pi. This way, your Pi will always have the same address, making it easier to connect to it later. Setting a static IP is a bit more involved, but it's worth the effort in the long run.
Configuring Your NAT Router
Okay, here's where things get a little tricky. Since your Raspberry Pi is behind a NAT router, you'll need to configure your router to allow incoming SSH connections. This is done through a process called port forwarding. Basically, you're telling your router to forward all incoming SSH traffic (which runs on port 22 by default) to your Raspberry Pi.
To do this, you'll need to log into your router's admin interface. This is usually done by typing your router's gateway IP address into your browser. Once you're in, look for the port forwarding section. You'll need to create a new rule that forwards port 22 to your Raspberry Pi's local IP address. Make sure to save your changes and restart your router if necessary.
Port Forwarding Explained
Let's take a moment to understand what port forwarding actually does. Think of your router as a big gatekeeper that controls all the traffic coming in and out of your network. By default, it blocks most incoming traffic to keep your network secure. But when you set up port forwarding, you're essentially telling your router, "Hey, if someone tries to connect to port 22, send them straight to my Raspberry Pi."
It's important to note that port forwarding can be a bit of a security risk if not done properly. That's why we'll cover some security tips later on to make sure your setup is as secure as possible.
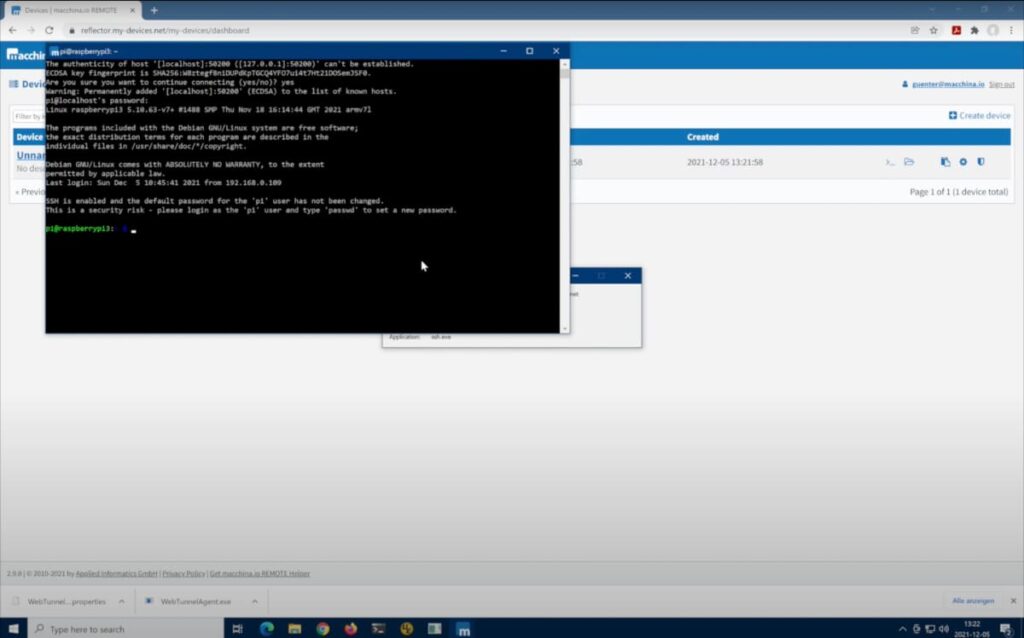
Using an SSH Client on Windows
Now that your Raspberry Pi is all set up and your router is configured, it's time to connect to your Pi from your Windows machine. The easiest way to do this is by using an SSH client. If you're using Windows 10 or later, you're in luck because SSH is already built into the command line. Just open up a command prompt and type ssh pi@your_pi_ip, replacing "your_pi_ip" with your Pi's local IP address.
If you prefer a graphical interface, you can use a tool like PuTTY. It's a free and open-source SSH client that's super easy to use. Just download it, open it up, and enter your Pi's IP address in the Host Name field. Hit Open, and you'll be connected in no time.
Security Considerations for Remote SSH
Before you start showing off your new remote SSH skills to all your friends, let's talk about security for a moment. As we mentioned earlier, opening up port 22 on your router can be a bit risky if not done properly. Here are a few tips to keep your setup as secure as possible:
- Change the default SSH port: Instead of using the default port 22, you can change it to something less obvious. This will make it harder for hackers to find your SSH server.
- Use strong passwords: Make sure your Raspberry Pi has a strong, unique password. Avoid using common passwords like "password" or "123456".
- Enable two-factor authentication: If possible, set up two-factor authentication for your SSH connections. This adds an extra layer of security by requiring a second form of verification.
- Limit SSH access: You can configure your Pi to only allow SSH connections from specific IP addresses. This way, even if someone manages to find your SSH server, they won't be able to connect unless they're coming from an allowed IP.
Troubleshooting Common Issues
Even the best-laid plans can go awry sometimes, so here are a few common issues you might run into and how to fix them:
- Can't connect to the Pi: Double-check your IP address and make sure your router's port forwarding is set up correctly.
- Connection refused: This usually means SSH isn't enabled on your Pi. Go back and make sure you've followed all the steps to enable it.
- Permission denied: If you're getting this error, it could mean your password is incorrect or your SSH keys aren't set up properly. Try resetting your password or regenerating your SSH keys.
Alternative Methods for Remote Access
While SSH is a great way to access your Raspberry Pi remotely, it's not the only option. Depending on your specific needs, you might want to consider some alternative methods:
- VNC: VNC allows you to remotely control your Pi's graphical interface, which can be useful if you need to do more than just run commands in a terminal.
- TeamViewer: This is a popular remote access tool that works across many platforms. It's easy to set up and doesn't require any router configuration.
- Cloud services: If you're feeling really adventurous, you can set up a cloud server to act as a middleman between you and your Pi. This can be a bit more involved, but it offers a lot of flexibility.
Conclusion and Next Steps
And there you have it, folks! You now know how to set up remote SSH into your Raspberry Pi behind a NAT router from your Windows machine. It's not as complicated as it might seem at first, and with a little practice, you'll be able to do it in your sleep. Remember to always keep security in mind and follow best practices to protect your Pi from unwanted visitors.
So what's next? Well, now that you have remote access to your Pi, the possibilities are endless. You can use it as a home server, a media center, a security camera, or even a weather station. The only limit is your imagination. And don't forget to share this guide with your friends who might find it useful. Together, we can build a community of Raspberry Pi enthusiasts who help each other learn and grow.
Thanks for reading, and happy tinkering!