Alright, listen up, friends! If you're diving into the world of Raspberry Pi and remote access, you're in the right place. SSH (Secure Shell) is like the secret handshake that lets you control your Pi from anywhere on the globe. But how do you SSH into Pi over the internet without turning your brain into a pretzel? Well, buckle up because we're about to break it down step by step!
Let’s face it, SSH isn’t just for tech wizards anymore. It’s become a necessity for anyone who wants to manage their Pi remotely, whether it's for a home automation project or just tinkering around with some cool code. In this guide, we’ll show you exactly how to SSH into Pi over the internet without exposing yourself to hackers or other digital nasties.
By the end of this article, you’ll have all the tools and tricks you need to set up secure remote access. So grab a coffee, and let’s get started. Oh, and don’t worry if you’re new to this whole SSH thing—we’re here to make it as simple and painless as possible!
Read also:Kannada Prabha Today Epaper Your Daily Dose Of News In Karnataka
Why SSH Into Pi Over the Internet? Understanding the Basics
Before we dive into the nitty-gritty, let’s talk about why SSH is such a big deal. SSH stands for Secure Shell, and it’s basically a protocol that allows you to securely connect to another computer—like your Raspberry Pi—from anywhere in the world. It’s like having a remote control for your Pi, but with military-grade security.
Here’s why you might want to SSH into Pi over the internet:
- Access your Pi from anywhere, whether you're at home, at work, or on vacation.
- Manage files, run commands, and update software without needing to be physically near your Pi.
- Set up headless systems, meaning you don’t need a monitor, keyboard, or mouse connected to your Pi.
- Keep your data safe with encryption, so no one can snoop on what you're doing.
Now that you know why SSH is awesome, let’s move on to the next step: setting it up!
Setting Up SSH on Your Raspberry Pi
Before you can SSH into Pi over the internet, you need to enable SSH on your Raspberry Pi. Don’t worry—it’s super easy. Here’s how you do it:
Enable SSH on Raspberry Pi OS
1. Boot up your Raspberry Pi and log in.
2. Open the Raspberry Pi Configuration tool by typing sudo raspi-config in the terminal.
3. Navigate to Interfacing Options and select SSH.
4. Choose Yes to enable SSH and then hit Ok.
5. Exit the configuration tool and reboot your Pi with sudo reboot.
Boom! SSH is now enabled on your Pi. But wait, there’s more. You also need to find your Pi’s local IP address so you can connect to it from your network.
Read also:Buffalo Wild Wings Thursday Deal Your Ultimate Wing Night Guide
Connecting to Your Pi Locally
Before you can SSH into Pi over the internet, it’s a good idea to test your setup locally. This will help you make sure everything is working before you take it online.
Find Your Pi’s Local IP Address
To find your Pi’s local IP address, type the following command in the terminal:
hostname -I
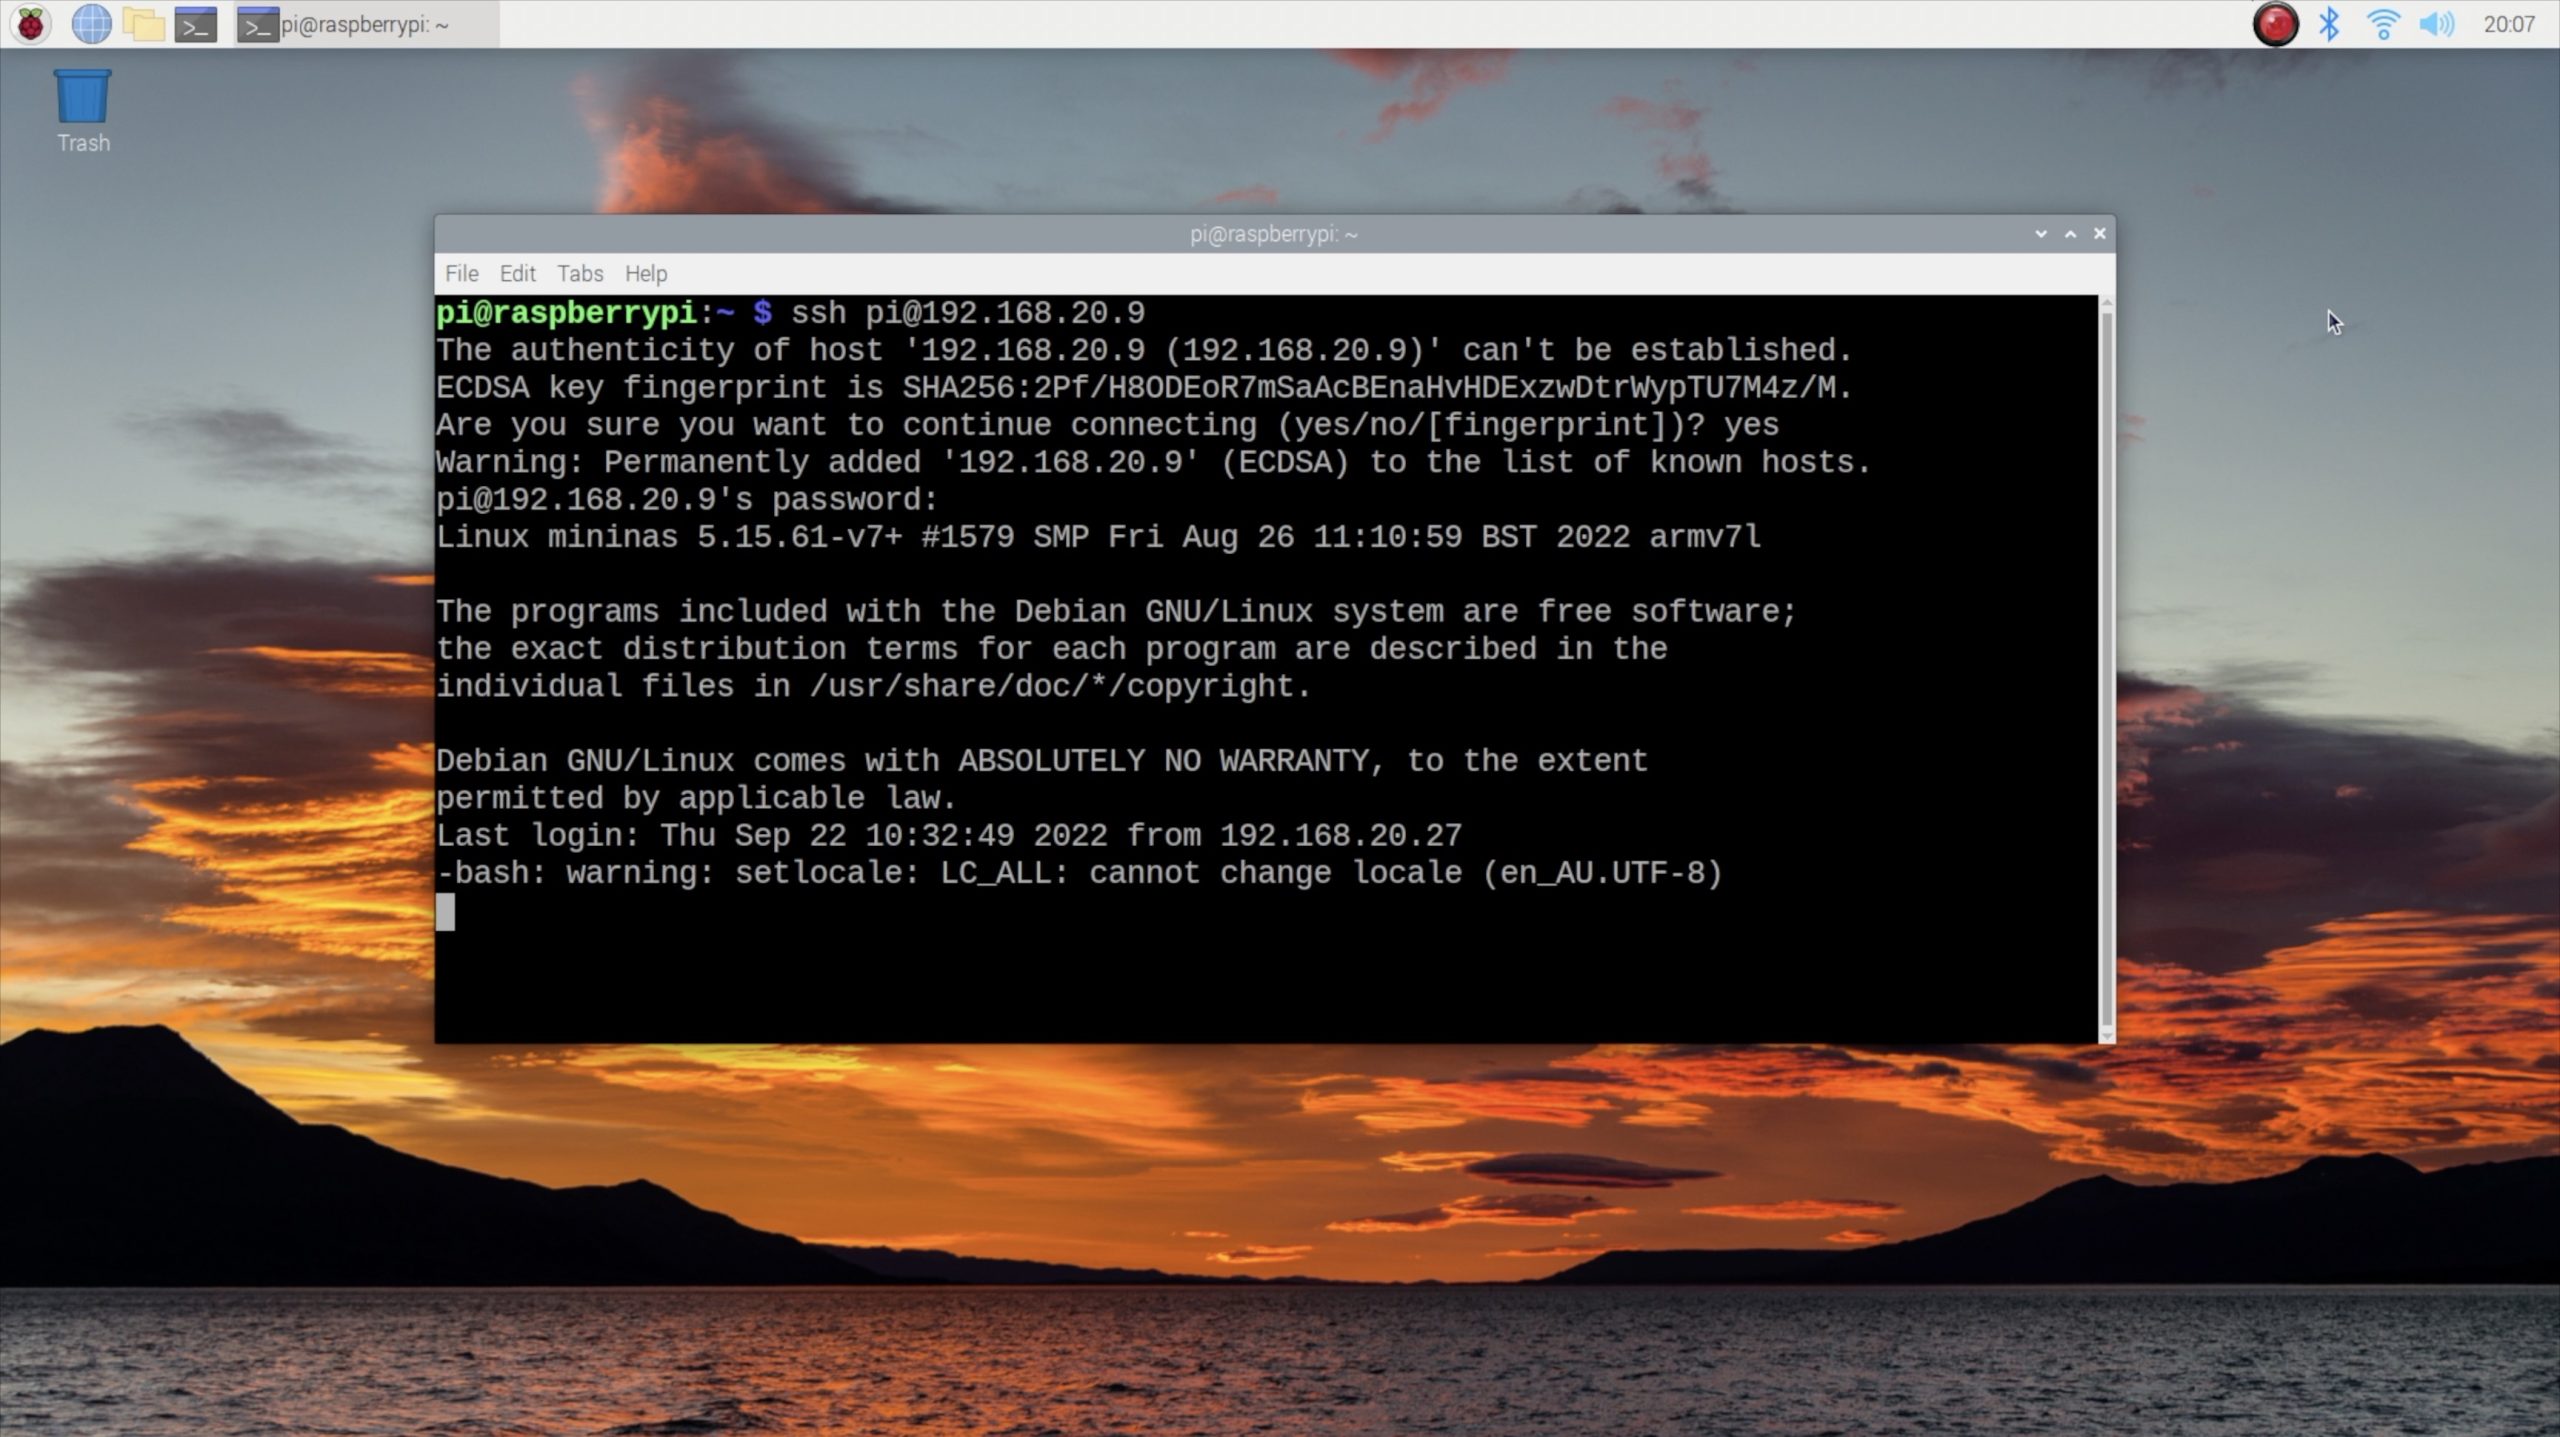
This will give you an IP address that looks something like 192.168.1.100. Now, on your other computer, open a terminal or command prompt and type:
ssh pi@192.168.1.100
When prompted, enter your Pi’s password (the default is raspberry if you haven’t changed it). If everything works, congratulations—you’ve just SSHed into your Pi locally!
How Do I SSH Into Pi Over the Internet? The Magic of Port Forwarding
Okay, here’s where things get interesting. To SSH into Pi over the internet, you need to make your Pi accessible from the outside world. This is where port forwarding comes in.
What Is Port Forwarding?
Port forwarding is like giving your Pi a special address that anyone on the internet can use to connect to it. It’s a bit like setting up a mailbox at the post office for your house—it lets people send you letters without needing your exact street address.
To set up port forwarding, follow these steps:
- Log in to your router’s admin interface (usually by typing
192.168.1.1or192.168.0.1into your browser). - Find the port forwarding section (it might be under Advanced Settings or something similar).
- Create a new rule and set the external port to
22(the default SSH port). - Set the internal IP address to your Pi’s local IP address (the one you found earlier).
- Save the settings and restart your router if necessary.
Once port forwarding is set up, you should be able to SSH into your Pi using your router’s public IP address. But hold on—we’re not done yet!
Securing Your SSH Connection
Now that your Pi is exposed to the internet, it’s important to make sure it’s secure. The last thing you want is some random hacker taking over your Pi and turning it into a crypto-mining machine.
Change the Default SSH Port
One of the easiest ways to improve security is to change the default SSH port from 22 to something else. Here’s how:
1. Open the SSH config file with sudo nano /etc/ssh/sshd_config.
2. Find the line that says Port 22 and change it to something like 2222.
3. Save the file and restart the SSH service with sudo service ssh restart.
Use Strong Passwords or SSH Keys
Another way to beef up security is to use strong passwords or, better yet, SSH keys. SSH keys are like digital fingerprints that let you log in without needing a password. Here’s how to set them up:
1. On your local computer, generate a key pair with ssh-keygen.
2. Copy the public key to your Pi with ssh-copy-id pi@your_pi_ip.
3. Test the connection by typing ssh pi@your_pi_ip—you should be able to log in without a password!
Dealing with Dynamic IP Addresses
Here’s a little gotcha: most home internet connections have dynamic IP addresses, which means your router’s public IP address can change without warning. This can make it tricky to SSH into Pi over the internet. But don’t worry—we’ve got a solution for that too.
Set Up a Dynamic DNS Service
A dynamic DNS (DDNS) service gives your router a hostname that stays the same even if your IP address changes. There are lots of DDNS services out there, but No-IP and DuckDNS are two popular options.
Once you’ve signed up for a DDNS service, follow their instructions to configure your router. Then, instead of using your router’s IP address to SSH into your Pi, you can use the hostname they provide.
Troubleshooting Common SSH Issues
Even the best-laid plans can go sideways sometimes. Here are some common SSH issues and how to fix them:
Can’t Connect to Pi
Make sure your Pi is powered on and connected to the network. Double-check your IP address and port number, and verify that SSH is enabled on your Pi.
Connection Refused
This usually means SSH isn’t running or the port isn’t open. Check your Pi’s SSH settings and make sure port forwarding is configured correctly on your router.
Permission Denied (publickey)
This error usually happens when SSH keys aren’t set up correctly. Make sure your public key is in the ~/.ssh/authorized_keys file on your Pi.
Advanced Tips for SSH Power Users
Once you’ve got the basics down, you might want to explore some advanced SSH features. Here are a few ideas:
Set Up SSH Tunnels
SSH tunnels let you securely forward traffic from one machine to another. This can be useful for accessing web services or other resources on your Pi from anywhere in the world.
Automate SSH Connections
If you frequently SSH into the same Pi, you can set up an SSH config file to make it easier. Just create a file called ~/.ssh/config and add an entry like this:
Host mypi
 Hostname your_pi_ip
 Port 2222
 User pi
Now you can SSH into your Pi with just ssh mypi!
Conclusion: You’re Now an SSH Pro!
And there you have it—a complete guide to SSH into Pi over the internet. Whether you’re managing a home automation system, running a web server, or just tinkering around, SSH gives you the power to control your Pi from anywhere in the world.
So what are you waiting for? Go ahead and try it out! And don’t forget to share your success stories—or your questions—in the comments below. We’d love to hear from you!
Table of Contents:
- Why SSH Into Pi Over the Internet?
- Setting Up SSH on Your Raspberry Pi
- Connecting to Your Pi Locally
- How Do I SSH Into Pi Over the Internet?
- Securing Your SSH Connection
- Dealing with Dynamic IP Addresses
- Troubleshooting Common SSH Issues
- Advanced Tips for SSH Power Users
- Set Up SSH Tunnels
- Automate SSH Connections